Jekyll blog
Getting a blog running with Jekyll + Gitlab + Namecheap
I felt like starting a new blog in order to post updates on some code snippets and new projects. So I might as well make the first post about how the blog setup was done. With Gitlab a jekyll blog can be easily initialized by creating a new project from the templates. Once you checkout the project make sure jekyll is installed and then you can run the blog locally.
sudo apt install jekyll
jekyll serve

# or with a specific environment
JEKYLL_ENV=dev jekyll serve
The main configurations can be set in the _config.yml file. For this blog there is no need for the subpath:
baseurl: "" # the subpath of your site, e.g. /blog
url: "https://straycode.xyz" # the base hostname & protocol for your site
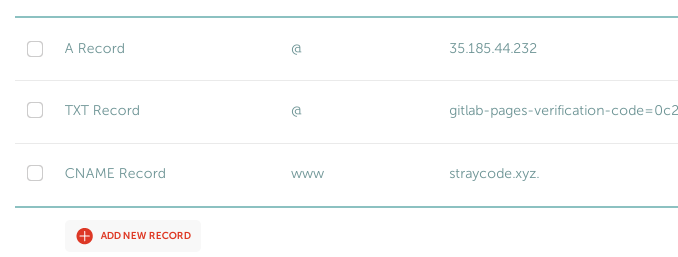
Setting up the domain requires first adding the domain in Gitlab in Settings -> Pages

The host records then need to be added in namecheap by going to Domain list -> Advanced DNS

It may take some time before the changes take effect and the verification in gitlab to go through. Deployment is already configured in _gitlab-ci.yml so all that is needed is to commit and push.
I needed to have some images on this first post and therefore some configuration was needed to have them working. The images were placed in a new directory /assets/img/ and the following was added to _config.yml
defaults:
  - scope:
      path: "assets/img"
    values:
      image: true
And in order to add images in markdown the following html file was added in the _includes folder
<!--image.html-->
<figure>
    <img src="/assets/img/{{ include.file }}" style="max-width: {{ include.max-width }};" alt="{{ include.alt }}"/>
    <figcaption style="color: gray; text-align: center">{{ include.caption }}</figcaption>
</figure>
This can then be used in markdown like so
<figure>
    <img src="/assets/img/gitlab-domain.png" style="max-width: ;" alt="Gitlab TXT record"/>
    <figcaption style="color: gray; text-align: center">Gitlab TXT record</figcaption>
</figure>
And that’s all you need to get your Jekyll blog up and running!